Chocolate Chip Pumpkin Cake with Brown Butter Cream Cheese Frosting

Biting into this cake signifies all of the things we love about the changing seasons. Warm notes of fall spices pleasantly mix with sweet chocolate and rich brown butter frosting. In this recipe, we highlight pumpkin in a cake that can be served both after dinner or alongside your morning coffee.

Chocolate Chip Pumpkin Cake with Brown Butter Cream Cheese Frosting
Makes 12 pieces

Biting into this cake signifies all of the things we love about the changing seasons. Warm notes of fall spices pleasantly mix with sweet chocolate and rich brown butter frosting. This recipe highlights pumpkin in a cake that can be served both after dinner or alongside your morning coffee.
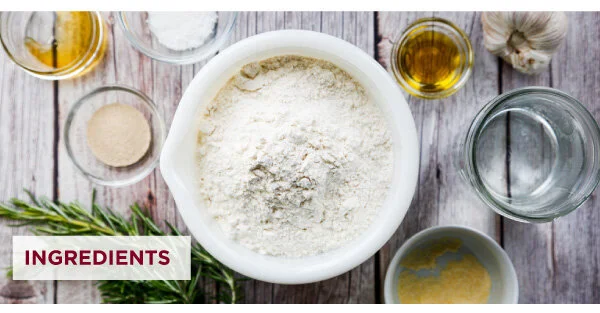
Ingredients:
4 eggs
1/2 cup white sugar
1 cup light brown sugar, packed
1 cup vegetable oil
1 can (15 oz) pumpkin puree
2 cups all purpose flour
2 teaspoons baking powder
1 teaspoon baking soda
1-1/2 teaspoons ground cinnamon
1/4 teaspoon ground nutmeg
1/4 teaspoon ground ginger
1/4 teaspoon ground clove
1 teaspoon ground allspice
1/2 teaspoon Kosher salt
1-1/4 cup dark chocolate chips

Brown Butter Frosting Ingredients:
1/2 cup butter
8 oz cream cheese, softened
1 teaspoon vanilla
3 cups confectioners’ sugar
1/4 teaspoon cinnamon for sprinkling

Directions:
1. Preheat the oven to 350°F.

2. In a stand mixer on medium-low speed, mix the eggs, white sugar, brown sugar, oil and pumpkin puree until incorporated. In a separate bowl, sift together the flour, baking powder, baking soda, cinnamon, nutmeg, ginger, clove, allspice, and salt.

3. Slowly add the flour mixture to the pumpkin mixture and continue to mix until combined. Fold in the chocolate chips.

4. Pour the batter into a 10” x 10” ungreased baking dish. Bake for 40-45 minutes or until a toothpick comes out clean. If the top or edges brown before the rest of the cake has baked, tent aluminum foil over the top. Cool on a cooling rack.

5. Make the frosting: Melt the butter in a small saucepan. Continue cooking over medium heat, stirring often, until the butter turns a light golden brown, about 5 minutes. Be careful not to burn the butter! Remove from heat and let the butter cool. In a stand mixer, mix together the cream cheese and the browned butter until fluffy. Add the vanilla and mix. Gradually add the confectioners’, sugar continuing to mix until smooth.

6. Once the cake has completely cooled, generously spread the frosting over the top of the cake in a thick layer. Dust with cinnamon and enjoy!

Roasted Garlic and Rosemary No-Knead Dutch Oven Bread

Bread. What’s not to love? A crunchy crust and soft, airy interior are just the beginning of our obsession. We love this recipe because it packs a serious flavor profile with minimal effort. It’s great for beginners, and takes less than three hours from start to a tasty finish. IN THIS ISSUE, we walk through the techniques of baking Dutch oven bread, and offer various success tips to inspire both novice and pro bakers alike!

Roasted Garlic and Rosemary No-Knead Dutch Oven Bread
Makes 1 loaf

Bread. What’s not to love? A crunchy crust and soft, airy interior are just the beginning of our obsession. We love this recipe because it packs a serious flavor profile with minimal effort. It’s great for beginners, and takes less than three hours from start to a tasty finish. A great recipe to inspire both novice and pro bakers alike!

Bread Ingredients:
1-1/2 teaspoon instant yeast
1-1/2 cups warm water (105° F)
1 teaspoon honey
1-1/2 teaspoon sea salt
2 tablespoons fresh rosemary, finely chopped
3 cups all purpose flour
1/2 teaspoon cornmeal
1 tablespoon olive oil, divided
1/2 teaspoon coarse/flaked sea salt

Roasted Garlic Ingredients:
1 head garlic
1 teaspoon olive oil

Directions:
1. Heat the oven to 400°F. Cut o the top of the garlic bulb to expose the cloves and place in a garlic roaster or a square of aluminum foil. Drizzle the garlic with the olive oil and cover. Or, in the case of foil, twist the corners at the top to prevent any oil drips during roasting. Roast for 30 minutes or until the cloves are soft and slightly browned. Remove from the oven and cool. Once cooled, use a small fork to remove the cloves from the head of garlic. Mash the soft cloves into a paste-like consistency.

2. Meanwhile, combine the yeast, water, and honey in a large mixing bowl. Let the mixture stand for about 5 minutes to allow the yeast to activate (the mixture should become slightly foamy.)

3. Add the mashed garlic, salt, and rosemary to the yeast mixture. Slowly add the flour to the mixing bowl in one cup increments, stirring with a wooden spoon until all the ingredients are incorporated. Do not over mix; the dough will be quite shaggy and sticky, yet will form a loose ball in the bowl.

4. Sprinkle the dough with a small amount of flour on top. Cover the bowl with a kitchen towel. Let the dough rise on the counter in a draft-free area for about 1 hour, or until it has roughly doubled in size.

5. On a lightly floured surface, with lightly floured hands, gently guide the dough into a ball. Place it back in the bowl, cover, and let the dough rise for another 30 minutes.

6. Preheat the oven to 450°F. Lightly coat the inside of an empty 5.5 qt. Dutch oven with 1/2 tablespoon of olive oil. Place the lid on the Dutch oven and put it in the middle of the oven. (Be sure to preheat the Dutch oven as the oven preheats; to avoid cracking of the pot’s enamel; never place a cold, empty Dutch oven in a hot oven.)

7. Lay a piece of parchment paper on the counter and sprinkle corn meal on the paper. Gently guide the risen dough out of the bowl and onto the parchment paper. Use the sides of the parchment paper to tip and coax the dough back into a circular form if it has lost its shape. Take care not to deflate the risen dough. Use oven mitts to remove the Dutch oven from the hot oven. Use the parchment paper to transfer the dough into the preheated Dutch oven. Brush the top with the olive oil. Use kitchen shears to cut an “X” on the top of the dough. Sprinkle the sea salt across the top.

8. Cover the bread with the Dutch oven lid. Use oven mitts to transfer the Dutch oven back into the oven. Bake for 30 minutes, until the bread is lightly browned. Remove the lid and cook for another 10 minutes, until the crust is nicely browned. The bread’s internal temperature should be between 195 - 210°F.

9. Cool on a cooling rack, then devour while warm, preferably with a healthy dose of butter and salt.

Creamy Butternut Squash Pasta with Sausage and Crispy Sage

Fall flavors unite in a most delightful way in this creamy, dreamy pasta!

IN THIS ISSUE, butternut squash is transformed into a tasty sauce. The naturally sweet sauce is balanced with spicy sausage, then generously topped with savory cheese and crispy sage leaves. It’s a wonderful kind of deliciousness!

Creamy Butternut Squash Pasta with Sausage and Crispy Sage 
Serves 8 - 10 

Fall flavors unite in a most delightful way in this creamy, dreamy pasta! Butternut squash is transformed into a tasty sauce. The naturally sweet sauce is balanced with spicy sausage, then generously topped with savory cheese and crispy sage leaves. It’s a wonderful kind of deliciousness! 

Ingredients: 
1 medium butternut squash, peeled, cut in half, seeds removed 
4 tablespoons butter 
20-25 fresh sage leaves 
1 lb hot Italian ground sausage 
2 tablespoons olive oil 
1 large shallot, finely diced 
2 cloves garlic, minced
1/2 cup white wine 
1 cup heavy whipping cream 
1 teaspoon Kosher salt 
1/2 teaspoon black pepper 
2 lbs pasta, ziti or another tube pasta 

Garnish: 
crispy sage leaves parmesan cheese, shaved or grated

Directions: 
1. Prep the butternut squash: Wash the squash well, cut both ends o the squash to create a flat surface. Peel the squash with a peeler. Slice in half length-wise and scoop out the seeds. 

2. Using a large pasta pot with a steamer basket, steam the butternut squash until it is fork tender, about 30-35 minutes. 

3. Remove the squash and purée with a blender or immersion blender until it is smooth. 

4. Meanwhile, in a large Dutch oven, sauté the sausage into bite-sized chunks until nicely browned. Remove the sausage from the pot. Set aside. Reserve the pot and drippings for the shallots, garlic, and the next steps in sauce making. 

5. Next, in a nonstick skillet, prepare the crispy sage leaves. Melt the butter, then sizzle the sage leaves on each side until just crisp. Place the leaves on a paper towel-lined plate to cool. Reserve the sage butter to sauté the shallot and garlic, and for adding to the sauce. 

6. Using the Dutch oven, add any remaining butter from the sage. Sauté the shallot and garlic until translucent. Add additional olive oil to sauté, as needed. 

7. Once the aromatics are softened, add 1/2 cup of white wine and simmer until the wine is reduced by half. 

8. Add the blended squash to the aromatics and stir until combined. Stir in the heavy cream. Gently simmer the sauce until the pasta is ready. Season with salt and pepper, to taste. 

9. Meanwhile, cook the pasta until al dente, reserve at least 1 cup of the pasta water, then drain well. 

10. Add the pasta to the sauce. Add up to 1 cup of reserved pasta water until the sauce reaches a silky consistency. 

11. Add the sausage to the pasta. Dish the pasta, and garnish with a hearty portion of freshly shaved or grated parmesan cheese. Top each serving with several crispy sage leaves.

Sweet Potato Doughnut Holes

Did someone say fresh, warm, doughnut holes? IN THIS ISSUE, we feature doughnut making tips and techniques! We love making these bite-sized treats at home because we can enjoy them by the handful and not feel guilty in front of anyone. Now you can too!

Sweet Potato and Cardamom Doughnut Holes
Makes about 30 doughnut holes

Did someone say fresh, warm, doughnut holes? These lovely morsels feature warm, autumn spices including allspice, cinnamon, and cardamom. And, since they are made with sweet potatoes, they’re almost healthy, right? We love making these bite-sized treats at home because we can enjoy them by the handful and not feel guilty in front of anyone. Now you can too!

Ingredients:
2-1/2 cups all-purpose flour
1/4 cup sugar
1 tablespoon baking powder
1/4 teaspoon allspice
1/4 teaspoon cardamom
3/4 teaspoon salt
5 tablespoons chilled butter
3/4 cup buttermilk
1/2 cup sweet potato, cooked and pureed (roughly 1 small sweet potato)
1/2 teaspoon vanilla
4 cups canola oil for frying

Cinnamon Sugar Topping:
1/3 cup granulated sugar (or powdered sugar)
1 teaspoon cinnamon

Directions:
1. In a large bowl, combine the flour, sugar, baking powder, allspice, cardamom, and salt. Whisk the ingredients together until evenly incorporated. Cut the butter into the flour until it resembles a crumb-like mixture.

2. Add the buttermilk, mashed sweet potato, and vanilla, Fold the dough together until all the ingredients are combined. The dough will be sticky to the touch.

3. Scoop out pieces of the dough and roll them into balls roughly 1-1/2" in diameter. Set aside.

4. in a separate, shallow dish, stir together the cinnamon and sugar. Set aside.

5. Add the oil to a medium-sized saucepan and warm the oil over medium-high heat until it reaches 350°F. Drop the doughnut holes in about 6 at a time.

6. Fry the doughnut holes, very carefully, for about 3-4 minutes, occasionally turning them in the oil to ensure all sides are getting cooked and browning evenly.

7. Use a slotted spoon, skimmer, or spider to transfer the doughnut holes to a paper towel-lined plate. After cooling the doughnuts for about 30 seconds, roll them in the cinnamon-sugar mix until they are fully covered. Enjoy immediately!

Easy Tikka Masala & Basmati Rice

In this recipe, we bring the wonderful flavors of chicken tikka masala to the table on any day of the week, thanks to the amazingly fast electric pressure cooker! Serve with fragrant basmati rice and generous sprinkles of chopped cilantro. YUM!

Easy Chicken Tikka Masala
Serves 4 - 6

Bring the wonderful flavors of this delicious dish home any day of the week thanks to the amazingly fast electric pressure cooker! This recipe calls for a lighter approach using slightly less butter than other recipes. A combination of Greek yogurt and coconut milk (instead of heavy whipping cream) adds a bit of extra tanginess to the global flavors. Savory spices mingle with fresh garlic, ginger, and tomatoes. The coconut milk creates a dreamy, silky sauce. Serve with fragrant basmati rice and generous sprinkles of chopped cilantro.

Ingredients:
4 large boneless chicken breasts, cut into 1” chunks
5 cloves garlic, finely minced
1-1/2 tablespoons fresh ginger, finely grated
3 tablespoons tomato paste
1 (28 oz.) can crushed tomatoes
2-1/2 teaspoons Garam Masala, divided
1 tablespoon ground cumin
1 tablespoon paprika
1/2 teaspoon cayenne pepper
1 teaspoon ground coriander
2 teaspoons Kosher salt
1/2 teaspoon ground black pepper
1 cup coconut milk
1 cup plain Greek yogurt
4 tablespoons butter, sliced into tablespoons
1 tablespoon cilantro, minced, plus additional for garnish

Electric Pressure Cooker Directions:
1. Prepare the garlic and ginger. Mince the garlic finely and grate the ginger into a fine paste.

2. Place the cut chicken in the bottom of an electric pressure cooker and then toss with the garlic and ginger.

3. In a large bowl, whisk together the tomato paste and crushed tomatoes until well combined.

4. Add the spices to the tomato mixture: 2 teaspoons Garam Masala, cumin, paprika, cayenne, coriander, Kosher salt, and black pepper. Stir until well combined.

5. Pour the spiced tomato mixture over the chicken. Toss until coated.

6. Cover, and cook on high pressure for 10 minutes.

7. Carefully release the pressure according to your appliance’s instructions. Check that the chicken is fully cooked and is at 165 degrees F. If the chicken needs more time, continue to cook on the simmer function until the chicken reaches 165 degrees in the center.

8. Once the chicken is fully cooked, add the coconut milk, yogurt, butter, 1/2 teaspoon Garam Masala and minced cilantro. Stir until combined and a sauce begins to form. If the sauce needs additional time to thicken, switch to the simmer function, and stir and simmer until the sauce thickens to your desired consistency.

9. Serve warm over basmati rice. Garnish with additional minced cilantro.

Basmati Rice:
1 tablespoon butter
2 tablespoons shallot, minced
2 cups basmati rice, rinsed
1/2 teaspoon Kosher salt
3-1/2 cups water

Rice Directions:
1. Rinse rice with cold water until the water runs clear.

2. Using a heavy-bottomed pot with a lid, sauté the shallot in the butter until the the shallot becomes translucent. Add the rice, and stir it until coated and every grain has a sheen.

3. Add the water and salt, and bring to a boil. Stir occasionally to make sure that the rice doesn't stick to the bottom. Once boiling, turn the heat to low and cover with a tight-fitting lid. Simmer the rice on low for 18-20 minutes or until the rice becomes tender.

4. Remove from heat, and let set for 10 minutes with the lid still on. Fluff with a fork before serving.

Classic Sloppy Joes

A classic loose meat sandwich, also known as a “Sloppy Joe,” is an easy answer to “what’s for dinner?” These sandwiches come together easily with just a handful of ingredients. Plus, it’s a great recipe for including kids in the kitchen. Served on a buttered and toasted buns, these sweet and tangy sandwiches simmered in a zingy tomato sauce always hit the spot! Make it a meal with a side of chips and our favorite super easy onion dip!

Classic Sloppy Joes
Makes 4 - 6 sandwiches

A classic loose meat sandwich, also known as a “Sloppy Joe,” is an easy answer to “what’s for dinner?” These sandwiches come together easily with just a handful of ingredients. Plus, it’s a great recipe for including kids in the kitchen. Served on a buttered and toasted buns, these sweet and tangy sandwiches simmered in a zingy tomato sauce always hit the spot! Make it a meal with a side of chips and our favorite super easy onion dip!

Ingredients:
1 pound ground beef
1/2 large sweet onion, minced (about 1 cup)
2 cloves garlic, minced
1/4 cup brown sugar
1/4 cup yellow mustard
1 teaspoon Worcestershire sauce
1/4 teaspoon fresh ground pepper
6 oz tomato paste
1 -to 1-1/4 cup cold water
6 buttered and toasted hamburger buns

Directions:
1. Prepare the onion and garlic by cutting into a fine mince.

2. In a large skillet, brown the ground beef. Chop and stir into small pieces and cook until well browned. Drain the ground beef in a paper towel-lined bowl.

3. Add the onion and garlic to the pan, and sauté until the onions have softened. Add the cooked ground beef back to the pan and stir until combined.

4. In a small bowl, mix together the sauce. Add the brown sugar, yellow mustard, Worcestershire sauce, pepper, and tomato paste and stir to combine.

5. Add the sauce to the meat mixture and stir until combined.

6. Add 1 cup of water to the mixture and simmer on low for 15 minutes or until the meat captures the sauce’s flavors. Stir the mixture occasionally as it simmers, and add additional water, as needed.

7. Butter the buns and arrange closely together on a large sheet pan. Broil until the buns are toasted to a golden brown. (Watch closely!)

8. Serve on a toasted and buttered bun with your favorite toppings.

Super Easy Onion Dip:
1 (8 oz) package cream cheese
2-3 tablespoons half & half
1-2 tablespoons minced onion, (more to taste)
1/2 teaspoon fresh ground black pepper
1/4 teaspoon Kosher salt

In a small food processor, blend together the dip ingredients. Add the half and half a few tablespoons at a time until you reach your desired dipping consistency. Adjust the dip by adding more onion and black pepper according to your taste. Serve with your favorite style of potato chips or fresh veggies!

Chicken Green Enchiladas

Cheesy and creamy, these green enchiladas are one great definition of comfort food! The green enchilada sauce is enhanced with a filling of grilled and diced chicken, white beans, green chilies, cheese, onion, garlic, herbs, and a little sour cream. After stuffing and rolling the enchiladas, add another layer of sauce on top. Don’t forget to finish with a hearty layer of cheese. After baking, garnish with fresh cilantro. So tasty!

Chicken Green Enchiladas
Makes 8 enchiladas

Enchiladas:
2 garlic & lime chicken breasts (marinated, grilled, and sliced)
2 tablespoons olive oil
1 onion, diced
2 cloves garlic, minced
1 teaspoon dried oregano
1 teaspoon dried cumin
1/2 teaspoon
Kosher salt
1/2 teaspoon freshly ground pepper
1 can (4 oz) diced green chilies
1 can white beans, rinsed and drained
2 cups Monterey Jack cheese, shredded
1 can (28 oz) green enchilada sauce
1 cup sour cream

Garnishes:
Lime wedges, Fresh cilantro leaves, Pickled jalapeños, Hot sauce

Garlic & Lime Grilled Chicken:
6 chicken breasts - some now, some later

Marinade:
1 tablespoon lime zest (about two small limes)
2 tablespoons chili powder
2 tablespoons garlic powder
1 tablespoon paprika
1 tablespoon cumin
1 tablespoon sugar
1 teaspoon pepper
1 teaspoon Kosher salt
1/2 cup vegetable oil
2 tablespoons fresh lime juice

Directions:
1. Preheat the oven to 400 degrees F.

2. Sauté the onion and garlic in a large skillet until the onion is translucent. Season the onions with oregano, cumin, salt, and pepper.

3. Add the green chilies, white beans, 1 cup of grated cheese, 1 cup green enchilada sauce, and 1 cup of sour cream. Stir to combine. Add the diced chicken and fold together until combined.

4. Spoon 1 cup of enchilada sauce around the bottom of the pan. This recipe makes about 8 enchiladas which can fit into a standard 9x12 casserole pan, or individual sized dishes that fit 2 enchiladas each.

5. Fill the tortillas with a scoop of the chicken mixture and roll up tightly. Place the stuffed tortillas seam side down in the pan. Pack the pan tightly.

6. Spoon more enchilada sauce on top of the rolled tortillas. Sprinkle one more cup of grated cheese on top.

7. Bake for 20-25 minutes or until the cheese has started to brown and the enchiladas are bubbling hot. 8. Serve warm with your choice of garnishes.

Garlic & Lime Grilled Chicken Directions:
1. In a small bowl, combine the lime zest and the marinade spices: chili powder, garlic powder, paprika, cumin, sugar, pepper, and salt. Stir together until evenly mixed.

2. Place the chicken breasts in a large bowl or in a sealable bag inside of a large bowl.

3. Pour the vegetable oil and lime juice over the chicken, then sprinkle with the spice mixture.

4. Rub the chicken with the spices until it is completely coated.

5. Cover the chicken and refrigerate. Marinate the chicken in the refrigerator for 3-4 hours or overnight.

6. Fire up the grill! Heat the grill; ensure your grill grates are clean and well-oiled.

7. Grill the chicken over direct heat until the internal temperature reaches 165 degrees F, turning as needed.

8. Remove the chicken from the grill and let it rest for 10 minutes.

9. Enjoy the chicken immediately or slice, dice, or shred to use in future recipes.

Chicken Fajitas

Fajitas are a colorful, delicious, and healthy option for getting dinner on the table quickly! With the chicken already marinated and grilled, simply grill onions and peppers to add to the chicken. Complete the tasty fajitas with an array of toppings! Some of our favorite fajita toppings include sour cream, cilantro, salsa, hot sauce, a squeeze of lime, salsa, and a little guacamole!

Chicken Fajitas
Serves 4

Fajitas:
2 chicken breasts (marinated, grilled, and diced)
4 flour tortillas, warmed
1 red pepper, sliced into strips
1 green pepper, sliced into strips
1 sweet onion, sliced pole to pole
2 tablespoons olive oil
1/2 teaspoon Kosher salt
1/2 teaspoon pepper

Toppings:
Sour cream
Avocado
Lime wedges
Fresh cilantro leaves
Salsa, and/or hot sauce

Garlic & Lime Grilled Chicken:
6 chicken breasts - some now, some later

Marinade:
1 tablespoon lime zest (about two small limes)
2 tablespoons chili powder
2 tablespoons garlic powder
1 tablespoon paprika
1 tablespoon cumin
1 tablespoon sugar
1 teaspoon pepper
1 teaspoon Kosher salt
1/2 cup vegetable oil
2 tablespoons fresh lime juice

Directions:
1. Prepare the chicken breasts according to the Garlic & Lime Chicken directions below.

2. Prepare the veggies. In a large bowl, toss the sliced peppers and onion with the olive oil, Kosher salt, and pepper. Grill the peppers and onion in a grill basket over direct heat or sauté in a skillet on the stovetop. Stir the vegetables often and cook until slightly charred in spots and cooked to your desired tenderness.

3. Toss the cooked vegetables with the grilled chicken slices.

4. Serve with warmed tortillas and a variety of your favorite toppings.

Garlic & Lime Grilled Chicken Directions:
1. In a small bowl, combine the lime zest and the marinade spices: chili powder, garlic powder, paprika, cumin, sugar, pepper, and salt. Stir together until evenly mixed.

2. Place the chicken breasts in a large bowl or in a sealable bag inside of a large bowl.

3. Pour the vegetable oil and lime juice over the chicken, then sprinkle with the spice mixture.

4. Rub the chicken with the spices until it is completely coated.

5. Cover the chicken and refrigerate. Marinate the chicken in the refrigerator for 3-4 hours or overnight.

6. Fire up the grill! Heat the grill; ensure your grill grates are clean and well-oiled.

7. Grill the chicken over direct heat until the internal temperature reaches 165 degrees F, turning as needed.

8. Remove the chicken from the grill and let it rest for 10 minutes.

9. Enjoy the chicken immediately or slice, dice, or shred to use in future recipes.

Loaded Chicken Quesadillas

These quesadillas are loaded with grilled and diced chicken, black beans, spinach, corn, and plenty of cheese. We love quesadillas for lunch or dinner. Everyone can customize their order to their own preference. Add additional flavor with a variety of toppings!

Loaded Chicken Quesadillas
Serves 4

Quesadillas:
2 chicken breasts (marinated, grilled, and diced)
8 tortillas
8 oz pepper jack cheese, grated
1 can (15 oz) black beans, rinsed and drained
8 oz frozen corn, thawed
4 oz spinach leaves

Toppings:
Sour cream
Avocado
Lime wedges
Fresh cilantro leaves
Salsa
Pickled jalapeños
Hot sauce

Garlic & Lime Grilled Chicken:
6 chicken breasts - some now, some later

Marinade:
1 tablespoon lime zest (about two small limes)
2 tablespoons chili powder
2 tablespoons garlic powder
1 tablespoon paprika
1 tablespoon cumin
1 tablespoon sugar
1 teaspoon pepper
1 teaspoon
Kosher salt
1/2 cup vegetable oil
2 tablespoons fresh lime juice

Directions:
1. Prepare the chicken breasts according to the Garlic & Lime Chicken directions below.

2. Use a panini press or a skillet on the stovetop to cook the quesadillas.

3. Load a tortilla with a layer of pepper jack cheese, then add all of the quesadilla ingredients: diced chicken, black beans, corn, and spinach leaves. Finish with another layer of cheese, then top with another tortilla.

4. If cooking on the stovetop use low heat and practice patience while the cheese melts! Using a large spatula, flip the quesadilla after the cheese has melted enough to hold it together.

5. Cut the quesadilla into wedges and enjoy warm with an array of toppings.

Garlic & Lime Grilled Chicken Directions:
1. In a small bowl, combine the lime zest and the marinade spices: chili powder, garlic powder, paprika, cumin, sugar, pepper, and salt. Stir together until evenly mixed.

2. Place the chicken breasts in a large bowl or in a sealable bag inside of a large bowl.

3. Pour the vegetable oil and lime juice over the chicken, then sprinkle with the spice mixture.

4. Rub the chicken with the spices until it is completely coated.

5. Cover the chicken and refrigerate. Marinate the chicken in the refrigerator for 3-4 hours or overnight.

6. Fire up the grill! Heat the grill; ensure your grill grates are clean and well-oiled.

7. Grill the chicken over direct heat until the internal temperature reaches 165 degrees F, turning as needed.

8. Remove the chicken from the grill and let it rest for 10 minutes.

9. Enjoy the chicken immediately or slice, dice, or shred to use in future recipes.

Fall Panzanella with Butternut Squash

Butternut squash is a fall favorite, and for good reason! This sweet, nutty vegetable is the perfect way to honor the changing of seasons. IN THIS ISSUE we slowly roast the squash until its edges crisp and caramelize, while the center remains soft and sweet. Paired with tart goat cheese, juicy raisins, and homemade croutons, this autumn version of a panzanella salad is dinner done well.

Panzanella Salad with Butternut Squash
Serves 6 - 8

Butternut squash is a fall favorite, and for good reason! This sweet, nutty vegetable is the perfect way to honor the changing of seasons. We slowly roast the squash until its edges crisp and caramelize, while the center remains soft and sweet. Paired with tart goat cheese, juicy raisins, and homemade croutons, this autumn version of a panzanella salad is dinner done well.

Ingredients:
1 small butternut squash
1/2 cup raw pumpkin seeds or 1/2 cup pepitas
2 tablespoons olive oil
1/4 teaspoon cayenne
1/4 teaspoon salt
1/4 teaspoon pepper
2 bunches kale
2 tablespoons butter
3/4 tablespoon Za’taar
1 French loaf, cut into 1” cubes
3 oz arugula
2 tablespoons raisins
4 oz goat cheese, crumbled
1/4 red onion, thinly sliced
Additional salt and pepper to taste

Dressing:
3 tablespoons olive oil
1/2 tablespoon balsamic vinegar
1 teaspoon red wine vinegar
1 clove garlic, minced
1/4 teaspoon salt
1/4 teaspoon pepper
1 teaspoon honey
1 tablespoon tahini

Directions:
1. Preheat the oven to 400°F. Wrangle the butternut squash by peeling, seeding and slicing it into 1” wedges. In a large bowl, toss the squash pieces with the raw pumpkin seeds, olive oil, cayenne, salt and pepper. Spread the mixture evenly on a roasting dish and roast for 40-45 minutes, turning the squash and seeds every 10 minutes until the squash is golden and tender. (If using pepitas, add to the roaster for just the last 5 minutes.) Remove from the oven.

2. Meanwhile, massage the kale in 1 tablespoon olive oil for about 2 minutes. Whisk together the dressing ingredients until all the ingredients are fully incorporated. Add half of the dressing to the kale, toss until the leaves are well-coated.

3. In a large skillet over medium-low heat, melt the butter and stir in the Za’taar seasoning. Add the cubes of bread and toss until croutons are evenly coated. Continue sautéing over medium heat until the croutons are golden and crispy.

4. Add the arugula to the kale, and top with the roasted butternut squash, pumpkin seeds, croutons, raisins, red onion, and crumbled goat cheese. Drizzle with the remaining dressing and season with additional salt and pepper to taste. Enjoy immediately.

Sweet Potato Tacos

This time of year we love any excuse to use our grill.

IN THIS ISSUE, we feature roasted sweet potato tacos with grilled sweet corn and tangy guacamole. Good tacos are the product of many quality parts, and wow, are these parts tasty! 

Sweet Potato Tacos with Grilled Corn and Avocado
Makes 12 small tacos

We love any excuse to use our grill. This recipe features roasted sweet potato tacos with grilled sweet corn and tangy guacamole. Good tacos are the product of many quality parts, and wow, are these parts tasty!

For the Roasted Sweet Potatoes:
2 sweet potatoes peeled and cubed into 1” pieces
1 tablespoon olive oil
1/4 teaspoon cumin
1/4 teaspoon cayenne pepper
1/4 teaspoon Kosher salt

For the Simple Guacamole:
2 avocados
1 clove garlic
1 jalapeño
1/2 small yellow onion, finely chopped
1 small lime, juiced
1 tablespoon olive oil
1/4 teaspoon Kosher salt
1/4 teaspoon pepper

Directions:
1. Preheat the oven to 425° F. Toss the cubed sweet potatoes with olive oil, cumin, cayenne and salt. Roast the sweet potato cubes in a large roasting dish for 30-40 minutes until tender and the edges begin to brown.

2. Prepare the guacamole by combining all of the guacamole ingredients in a medium bowl and mash with a fork until creamy. Transfer the guacamole to a serving bowl, and set aside.

3. In a medium pan over medium heat, cook the onion in the olive oil until the onion is soft and translucent, about 3-5 minutes. Add the black beans, cumin, chili powder, salt and pepper and cook over low heat, stirring occasionally to the beans don’t scorch.

4. Oil and preheat grill. Drizzle the corn with olive oil and sprinkle with salt and pepper. Grill the corn over direct heat for about 10 minutes, turning often until charred all over. Remove from the grill and let the corn cool slightly. Cut corn from the cob.

5. While the corn cools, grill the flour tortillas until grill marks appear.

6. Remove the potatoes from the oven and assemble the tacos, first layering the beans, then the sweet potatoes, then the corn, and finally the guacamole. Top with crumbles of cotija cheese, sliced green onions, and a squeeze of lime.

Orange & Thyme Pork Tenderloin

Pork tenderloins are perfectly primed for adapting to flavorful marinades. This marinade features fresh orange juice, thyme leaves and a few other classic marinade flavormakers like Dijon mustard, soy sauce, brown sugar, and garlic powder. It’s an easy and delicious recipe!

Orange & Thyme Pork Tenderloin
Serves 4 - 6

Ingredients:
2 pork tenderloins

Marinade:
1 tablespoon Dijon mustard
2 cloves garlic, minced
2 tablespoons brown sugar
2 tablespoons orange juice
3 tablespoons soy sauce
2 tablespoons olive oil
1/2 teaspoon Kosher salt
1/2 teaspoon freshly ground black pepper
1/2 teaspoon garlic powder
4 sprigs of thyme, leaves only

Directions:
1. Prepare the marinade in a medium bowl by whisking all of the ingredients together.

2. Add the pork tenderloins to the marinade, cover, and refrigerate for at least one hour for the flavors to infuse into the meat.

3. Fire up the grill! Let the marinated tenderloins warm to room temperature for 20 minutes before grilling. Place the marinated tenderloins on the hot, well-oiled grill, and sear for 3-4 minutes on each side. Turn until all sides have seared and browned, and then, turn o one burner (or turn to low) to create a direct/indirect environment. Place the seared tenderloins on the cooler, indirect side, and continue to cook until their internal temperature reaches 145 degrees F.

4. Once the pork tenderloins reach 145 degrees F, place on a clean plate, and cover loosely with a tinfoil "tent" for about 10 minutes. This allows the meat to rest, and the juices to soak back into the meat.

5. Slice the grilled tenderloins, and serve warm.

Arugula, Heirloom Tomato & Whipped Ricotta Salad

Arugula, Heirloom Tomato & Whipped Ricotta Salad
Serves 4 - 6

Whipped ricotta turns this salad into a creamy, dreamy delight! Spicy arugula complements the lemon-y, smooth whipped ricotta and the ripe grape tomatoes punctuate each bite with bursts of brightness.

Salad Ingredients:
15 oz fresh ricotta cheese
1 tablespoon olive oil
1 tablespoon fresh lemon juice
1 teaspoon lemon zest
1/4 teaspoon kosher salt
6 oz arugula
Heirloom cherry tomatoes
Basil, chifonade cut for garnishing

Vinaigrette Ingredients:
3 tablespoons olive oil
1 tablespoon white wine vinegar
Juice of half a lemon
Salt and pepper

Directions:
1. In a food processor or high-powered blender, whip the ricotta with olive oil, fresh lemon juice, lemon zest, and salt until very smooth.

2. Whisk the vinaigrette ingredients together in a small jar.

3. Toss the arugula with the vinaigrette. Spread the ricotta on a large serving plate.

4. Top the ricotta layer with arugula, heirloom cherry tomatoes, and a garnish of basil.

Grilled Carrots with Minted Yogurt Sauce

Carrots are transformed on the grill! With some simple seasonings and the utility of a grill basket, simple carrots become elevated into a flavorful, sweet, and savory side! Dressed up with an easy za’atar yogurt sauce, this side dish is worthy of repeating often.

Grilled Carrots with Minted Yogurt Sauce
Serves 4 - 6

Ingredients:
10 carrots, or about 2 lbs carrots, peeled and cut into 3” matchsticks
3 tablespoons olive oil
1/2 teaspoon garlic powder
1/2 teaspoon of Kosher salt
1/2 teaspoon freshly cracked black pepper
1 tablespoon sugar

Yogurt Sauce:
1 cup plain Greek yogurt
1 tablespoon fresh lemon juice (or about half of a small lemon)
1/2 teaspoon Kosher salt
1/2 teaspoon freshly ground black pepper
1 teaspoon Za’atar spice blend

Garnish:
Fresh cilantro leaves, coarsely chopped

Directions:
1. Peel the carrots, and cut into 3” long matchsticks.

2. Prepare the carrots for grilling: Place the carrots in a large bowl. Drizzle with olive oil and toss Sprinkle with garlic powder, Kosher salt, pepper, and sugar.

3. Grill the carrots in a grill basket over high heat until slightly blistered, a little charred, and just tender, stirring often.

4. While the carrots are grilling, prepare the yogurt sauce by whisking all of the yogurt sauce ingredients together.

5. Serve the grilled carrots with a drizzle of yogurt sauce, and a generous garnish of fresh cilantro.

Blackberry & Lemon Iced Tea

Summer’s end is nearly here – time to plan one last hurrah on the back patio! IN THIS ISSUE, we’ve planned a perfect end-of-summer dinner menu with Orange & Thyme Pork Tenderloin, an Arugula, Heirloom Tomato & Whipped Ricotta Salad, Grilled Carrots with Minted Yogurt Sauce, and a refreshing Blackberry & Lemon Iced Tea. Cheers to this (Unusual) Summer! 

Blackberry & Lemon Iced Tea
Makes 8 cups iced tea

Nothing says summer like iced tea. We’ve decided to spruce up this favorite by adding fresh blackberries and slices of lemon to the tea we love so much. A great accompaniment to any al fresco meal.

Ingredients:
2 cups fresh blackberries, divided
1/4 cup sugar
8 cups water, divided
8 black tea bags
1 lemon, sliced

Directions:
1. Mash or puree 1 cup of blackberries with 1/4 cup sugar.

2. Bring 5 cups of water to a boil. Add the tea bags to the hot water and steep for 6-8 minutes, then remove the tea bags.

3. Pour the hot tea over the blackberry mixture and let sit for 1 hour. Then, strain through a fine mesh sieve.

4. Add 3 cups of cold water and taste the tea. Adjust the sweetness to your preference, then refrigerate for 2 hours or overnight.

5. Serve on ice with a garnish of lemon wedges and remaining cup of whole blackberries.

6. Optionally, add a float of bourbon on top before serving.

Peach-Blueberry Cobbler

Fresh, ripe blueberries and peaches are truly one of the best parts of summer. The window is short; enjoy both in as many ways as you can! Definitely include this cobbler on your culinary bucket list a couple of times before the season is over. There are many types of cobbler - some cake-like, others with a more biscuit-like character. This time around, we’re featuring a fabulous biscuit-type topping. Slightly sweetened biscuits bake atop a pan of bubbling fruit. The only thing left to do is scoop your favorite vanilla ice cream on top!

Peach & Blueberry Cobbler
Serves 4 - 6

Fresh, ripe blueberries and peaches are truly one of the best parts of summer. The window is short; enjoy both in as many ways as you can! Definitely include this cobbler on your culinary bucket list a couple of times before the season is over. There are many types of cobbler – some cake-like, others with a more biscuit-like character. This time around, we’re featuring a fabulous biscuit-type topping. Slightly sweetened biscuits bake atop a pan of bubbling fruit. The only thing left to do is scoop your favorite vanilla ice cream on top!

Filling:
6 peaches, pitted, peeled, sliced
2 cups blueberries, washed and destemmed
1 tablespoon lemon juice, freshly squeezed
1/8 cup white sugar
1/8 cup brown sugar
1 tbsp cornstarch
1/8 teaspoon cinnamon
1/8 teaspoon salt

Topping:
1-2 tablespoons butter, melted
1 tablespoon white sugar
1/8 teaspoon cinnamon

Biscuit Topping:
2 cups all-purpose flour (plus 1/4 cup extra)
1/4 cup white sugar
1 tablespoon baking powder
1 teaspoon Kosher salt
1/2 cup chilled butter, diced into
1/2-inch cubes
3/4 cup milk (plus 2-3 tbsp more)
2 teaspoons vanilla extract

Serve with:
Vanilla ice cream

Directions:
1. Preheat the oven to 425°F. Prepare a ceramic baking dish (about a 2-quart capacity) by lightly buttering.

2. Prepare the filling. Prepare the peaches by peeling, pitting, and slicing into thin, crescent-shaped slices.

3. In a large bowl, add the blueberries to the peach slices. Sprinkle with the white sugar, brown sugar, cornstarch, cinnamon, and salt. Stir until combined.

4. Place the peaches and blueberries in the prepared baking dish and place in the oven for 20 minutes to jumpstart the baking process.

5. Meanwhile, prepare the biscuit topping. In a large mixing bowl, mix together the flour, sugar, baking powder, and salt. Stir to evenly combine the ingredients.

6. Add half of the diced butter to the flour mixture and combine well with a pastry blender or fork. Add the remaining diced butter and continue to blend leaving pea-sized pieces of butter.

7. Add the vanilla extract to the milk. Add the milk mixture to the flour-butter mixture, and stir together until a rough dough is formed. Turn out the dough onto a lightly floured board and gather the dough together. Knead 2-3 times to form a dough ball. Flatten the dough ball to about a 1/2-inch thickness.

8. Using a 2-inch biscuit cutter, cut circles of dough.

9. Place the biscuits on top of the hot fruit in the baking dish. Brush the tops of each dough piece with melted butter. Extra biscuit dough? Simply bake in the oven on a baking sheet until golden brown.

10. In a small bowl, stir together the sugar-cinnamon topping. Sprinkle the mixture on top of the entire dish.

11. Continue baking in a 425°F oven until the biscuit dough is cooked through and the tops nicely golden brown, about 15 more minutes. Remove from the oven and allow to cool for 30 minutes.

12. Serve warm (not hot) with your favorite vanilla ice cream.

Quick Carrot Pickles

Quick Carrot Pickles
Makes about 2 pints

These pickled asparagus spears are a beautiful and tasty addition to any crudite or antipasto plate! The quick blanching and plunge in ice water ensures that the final pickled spears are tender. The white wine vinegar brine is mild in flavor while the rosemary, crushed red pepper, and garlic season the spears nicely.

Ingredients:
6 medium carrots, trimmed into sticks 1/2" short than the jar
1/2-inch fresh ginger, peeled and thinly sliced
1 clove garlic, thinly sliced

Brine Ingredients:
1 cup apple cider vinegar
1 cup water
1 tablespoon kosher or pickling salt
1 tablespoon sugar
1 teaspoon turmeric
1/2 teaspoon ground coriander
1/2 teaspoon mustard seeds
1/2 teaspoon pepper corns
4-6 whole cloves

Directions:
1. Slice the carrots into sticks -- approximately the same size and length.

2. Closely pack the carrot sticks in two clean canning jars along with the ginger and garlic slices.

3. In a medium saucepan, bring the brine ingredients to a boil for 3 minutes. Remove the pickling liquid from heat and slowly pour over the carrots until about 1/4 inch from the top, covering the carrots completely.

4. Cover and refrigerate the pickles overnight before serving.

5. Keep refrigerated. Enjoy the pickles for up to one week.

Spicy Pickled Green Beans

Spicy Pickled Green Beans
Makes about 3 pints

You’ll enjoy these green beans that feature a kick! Pickled green beans get a little spicy with the addition of jalapeño strips. Try these spicy pickled green beans in a salad, or on their own as a snappy snack!

Ingredients:
1 pound green beans, trimmed to 1/2" shorter than the jar
3 jalapeños, sliced into thin strips
1 clove garlic, thinly sliced
1 tablespoon mustard seeds
1 tablespoon peppercorns
1-1/2 cups apple cider vinegar
1-1/2 cups water
1 tablespoons kosher salt
1 tablespoon sugar

Directions:
1. Blanch the prepped green beans and jalapeño strips by boiling in a large pot of water for 2 minutes. Plunge them into an ice bath to preserve the green color and to stop from over-cooking.

2. Clean and sterilize 3 pint-sized canning jars. Fill the jars with the blanched green beans, jalapeño slices, and garlic slices. Tightly pack the green beans in the jar vertically. Divide the mustard seeds and peppercorns into the jars.

3. Prepare the brine: In a saucepan, bring the vinegar, water, salt, and sugar to a boil. Boil for three minutes. Let the brine cool.

4. Pour the brine into each jar, covering the green beans completely.

5. Cover and refrigerate the pickles overnight before serving.

6. Keep refrigerated. Enjoy the pickles for up to one week.

Easy Pickled Asparagus

Easy Pickled Asparagus
Makes about one quart

These pickled asparagus spears are a beautiful and tasty addition to any crudite or antipasto plate! The quick blanching and plunge in ice water ensures that the final pickled spears are tender. The white wine vinegar brine is mild in flavor while the rosemary, crushed red pepper, and garlic season the spears nicely.

Ingredients:
1 pound asparagus, trimmed to 1" shorter than the jar
2 cloves garlic, whole
1/2 tablespoon mustard seeds
1/2 tablespoon peppercorns
1-1/4 cups white wine vinegar (at least 5% acidity)
1-1/4 cups water
1 tablespoons kosher salt
1 tablespoon sugar
1 teaspoon crushed red pepper flakes
2 sprigs rosemary

Directions:
1. Blanch the asparagus. Boil in a large pot of water for 2 minutes, and then plunge into an ice bath to preserve the green color and to stop from over-cooking.

2. Clean and sterilize a quart-sized canning jar. Fill the jar with the blanched asparagus and garlic. Tightly pack the asparagus and rosemary in the jar with tips up. Place the mustard seeds, peppercorns, and crushed red pepper into the jar.

3. Prepare the brine. In a saucepan, bring the vinegar, water, salt, and sugar to a boil. Boil for three minutes. Let the brine cool.

4. Pour the brine into each jar, covering the vegetables completely.

5. Cover and refrigerate the pickles overnight before serving.

6. Keep refrigerated. Enjoy the pickles for up to one week.

Summer Rolls with Spicy Peanut Sauce

Avoid turning on your stove or oven - make fresh summer rolls for dinner instead! A fun alternative to a salad, rice paper wrapped “summer rolls” are a delicious way to eat a healthy serving of summer vegetables. Bring these colorful summer rolls with spicy peanut sauce to the table – they will be eaten up in no time!

Avoid turning on your stove or oven - make fresh summer rolls for dinner instead! A fun alternative to a salad, rice paper wrapped “summer rolls” are a delicious way to eat a healthy serving of summer vegetables. Bring these colorful summer rolls with spicy peanut sauce to the table -- they will be eaten up in no time!

Ingredients:
1 package rice paper wrappers
2 cups fresh edamame, shelled (or thawed frozen edamame)
1 red pepper, cut into matchsticks
3 green onions, sliced
2 carrots, spiralized
1 bunch cilantro leaves
1 avocado, thinly sliced
1/4 red cabbage, thinly sliced

Spicy Peanut Sauce:
1/2 cup fresh peanut butter
1 tablespoon chili garlic sauce
1 tablespoon soy sauce
3 teaspoon rice wine vinegar
1 teaspoon sesame oil
1 lime, juiced
1 clove garlic, finely minced, or crushed
1 tsp ginger, finely minced, or grated

Directions:
1. Prepare all of the vegetables and stage in individual prep bowls.

2. Whisk together all of the sauce ingredients, thinning with water, as needed.

3. Singly, submerge the rice wrappers in water for 15-20 seconds each, then artfully fill with the vegetables. Fill the bottom 1/3 of the wrapper with veggies, leaving a generous margin to each side. Roll once half-way covering veggies. Place additional vegetables in the top 1/3 taking care to artfully place so that a beautiful pattern may be seen on the top 1/3 of the wrap. Fold over both sides on wrap. Finish the rolling motion until the wrap is fully rolled and sealed.

4. Slightly moisten a serving plate, and place the rolls on the plate in a single layer (not touching). Refrigerate for a short time or enjoy them immediately. (They will not keep moist for very long, so enjoy them soon!

5. Serve the rolls whole or cut in half with a personal serving of sauce on the side.